This guide shows how to get Zabbix up and running within a zone on an OmniOS system. Zabbix is an open-source monitoring system and is available from the OmniOS Extra repository.
Zone setup
I’m going to use the lightweight sparse zone brand for this so start by making sure that it is installed:
% pfexec pkg install brand/sparse
No updates necessary for this image.
If the brand is not already installed, then there will be more output from the above command.
Create a new sparse zone called zabbix. My preference is to configure the
IP stack within the zone configuration which results in it being automatically
applied to the zone when it’s booted, and enables additional protection against
settings such as the IP address from being changed from within the zone. Note
that, like all zones, the zone path must be a direct descendant of a ZFS
dataset. On my system, /zones is the mount point for such a dataset.
% pfexec zonecfg -z zabbix
zabbix: No such zone configured
Use 'create' to begin configuring a new zone.
zonecfg:zabbix> create -t sparse
zonecfg:zabbix> set zonepath=/zones/zabbix
zonecfg:zabbix> add net
zonecfg:zabbix:net> set physical=zabbix0
zonecfg:zabbix:net> set global-nic=igb0
zonecfg:zabbix:net> set allowed-address=172.27.10.35/24
zonecfg:zabbix:net> set defrouter=172.27.10.254
zonecfg:zabbix:net> end
zonecfg:zabbix> add attr
zonecfg:zabbix:attr> set name=resolvers; set type=string; set value=1.1.1.1
zonecfg:zabbix:attr> end
zonecfg:zabbix> add attr
zonecfg:zabbix:attr> set name=dns-domain; set type=string; set value=omnios.org
zonecfg:zabbix:attr> end
zonecfg:zabbix:attr> verify; commit; exit
By default, the zone’s boot environment will encompass all of the files and directories within. For an application such as Zabbix, it’s important to create a dedicated area to hold files such as the underlying database which should be consistent across different boot environments.
My system has a ZFS pool called data so I’m going to create a new dataset
under that and delegate it to the zone. I’m also going to change the
mount point for the dataset to /data so that it appears there within the
zone.
% pfexec zfs create data/zabbix
% pfexec zonecfg -z zabbix 'add dataset; set name=data/zabbix; end'

% pfexec zfs umount data/zabbix
% pfexec zfs set mountpoint=/data data/zabbix
% pfexec zfs set zoned=on data/zabbix
Now it’s time to install the zone. Being a sparse zone, this will be pretty quick - only around 5MiB of files are actually installed.
% pfexec zoneadm -z zabbix install
A ZFS file system has been created for this zone.

       Image: Preparing at /zones/zabbix/root.
Sanity Check: Looking for 'entire' incorporation.
   Publisher: Using omnios (https://pkg.omnios.org/r151034/core/).
   Publisher: Using extra.omnios (https://pkg.omnios.org/r151034/extra/).
       Cache: Using /var/pkg/publisher.
  Installing: Packages (output follows)
Packages to install: 203
Mediators to change:   5
 Services to change:   6

DOWNLOAD                                PKGS         FILES    XFER (MB)   SPEED
Completed                            203/203     1485/1485      4.9/4.9      --

PHASE                                          ITEMS
Installing new actions                     5927/5927
Updating package state database                 Done
Updating package cache                           0/0
Updating image state                            Done
Creating fast lookup database                   Done
 Postinstall: Copying SMF seed repository ... done.
        Done: Installation completed in 16.942 seconds.
Let’s boot the zone and log in:
% pfexec zoneadm -z zabbix boot
% pfexec zlogin zabbix
[Connected to zone 'zabbix' pts/17]
OmniOS 5.11 omnios-r151034-831ff8e83b   July 2020
root@zabbix#
Since this is the first boot, it will take a minute for all of the service
manifests to be imported. Watch the output of svcs -x until nothing is
returned:
root@zabbix# svcs -x
root@zabbix#
Check Internet connectivity and DNS:
root@zabbix# ping 1.1.1.1
1.1.1.1 is alive
root@zabbix# ping google.com
google.com is alive
and check the delegated dataset:
root@zabbix# df -h /data
Filesystem             Size   Used  Available Capacity  Mounted on
data/zabbix           3.51T    42K      1.57T     1%    /data
Install the zabbix server package, which will automatically install the correct version of dependencies:
root@zabbix# pkg install zabbix-server
           Packages to install:  6
           Mediators to change:  1
            Services to change:  4
       Create boot environment: No
Create backup boot environment: No

DOWNLOAD                                PKGS         FILES    XFER (MB)   SPEED
Completed                                6/6     3082/3082    22.7/22.7  1.2M/s

PHASE                                          ITEMS
Installing new actions                     4013/4013
Updating package state database                 Done
Updating package cache                           0/0
Updating image state                            Done
Creating fast lookup database                   Done
Updating package cache                           2/2
Database
The OmniOS Zabbix package needs a database for storage. The database can be either Postgres or MariaDB, both of which are available as packages from the OmniOS Extra repository. The default supported database is Postgres and that is the database that will be used in the rest of this walk through. To switch zabbix over to using MariaDB, it is necessary to change the zabbix mediator:
root@zabbix# pkg set-mediator -I mariadb zabbix
Whichever database is used, the underlying database files are one of the things that should be stored on the dedicated dataset that was delegated to the zone.
Create a new ZFS filesystem for the database. For a Postgres database, it’s recommended to set the filesystem recordsize to 8K, and to set the log bias mode to throughput, as shown here. Also for security, executable, setuid and device files are explicitly disabled on the filesystem.
root@zabbix# zfs create data/zabbix/db
root@zabbix# zfs set recordsize=8k data/zabbix/db
root@zabbix# zfs set logbias=throughput data/zabbix/db
root@zabbix# zfs set exec=off data/zabbix/db
root@zabbix# zfs set devices=off data/zabbix/db
root@zabbix# zfs set setuid=off data/zabbix/db
This new dataset inherits the mountpoint from the filesystem:
root@zabbix# df -h | grep data/zab
data/zabbix           3.51T    42K      1.57T     1%    /data
data/zabbix/db        3.51T    42K      1.57T     1%    /data/db
Set up the initial database in the dedicated ZFS dataset:
root@zabbix# chown postgres /data/db
root@zabbix# chmod 0700 /data/db
root@zabbix# svccfg -s postgresql12:default \
	setprop application/datadir = /data/db
root@zabbix# svcadm refresh postgresql12:default
root@zabbix# cd /data/db
root@zabbix:/data/db# sudo -u postgres /opt/ooce/pgsql-12/bin/initdb -D .
The files belonging to this database system will be owned by user "postgres".
This user must also own the server process.

The database cluster will be initialized with locale "C".
The default database encoding has accordingly been set to "SQL_ASCII".
The default text search configuration will be set to "english".

Data page checksums are disabled.
...
Success. You can now start the database server using:
Start the database service using svcadm:
root@zabbix# cd
root@zabbix# svcadm enable postgresql12
root@zabbix# svcs postgresql12
STATE          STIME    FMRI
online         12:32:12 svc:/ooce/database/postgresql12:default
Create the zabbix database user - enter a password to secure the account when prompted.
root@zabbix# sudo -u postgres createuser --pwprompt zabbix
Enter password for new role:
Enter it again:
Create the database and import initial data:
root@zabbix# sudo -u postgres createdb -O zabbix \
	-E Unicode -T template0 zabbix
root@zabbix# cd /opt/ooce/zabbix/sql/pgsql
root@zabbix:/opt/ooce/zabbix/sql# cat schema.sql images.sql data.sql \
	| sudo -u zabbix psql zabbix
... lots of output, not shown here ...
COMMIT
Web interface
Zabbix comes with a web interface written in PHP. I’m going to use the
nginx web server to serve this over HTTP.
Install packages:
root@zabbix# pkg install nginx php-74
...
DOWNLOAD                                PKGS         FILES    XFER (MB)   SPEED
Completed                              10/10       517/517    22.9/22.9  2.2M/s
...
Edit the /etc/opt/ooce/nginx/nginx.conf file and replace the example
server block in there with the following:
    server {
        listen       80;
        server_name  localhost;
        root /opt/ooce/zabbix/ui;
        index index.php;
        location ~ \.php$ {
                try_files $uri =404;
                fastcgi_pass unix:/var/opt/ooce/php/run/www-7.4.sock;
                fastcgi_index index.php;
                include fastcgi.conf;
        }
    }
A few PHP settings need to be tweaked for proper Zabbix operation. This example sets the time zone to UTC but you can set it to local time if you prefer.
root@zabbix# cd /etc/opt/ooce/php-7.4/
root@zabbix# sed -i '/post_max_size/s/=.*/= 16M/' php.ini
root@zabbix# sed -i '/execution_time/s/=.*/= 300/' php.ini
root@zabbix# sed -i '/input_time/s/=.*/= 300/' php.ini
root@zabbix# sed -i '/date.timezone/s/.*/date.timezone = UTC/' php.ini
Grant PHP permissions to manage the zabbix UI configuration file:
root@zabbix# chown php /opt/ooce/zabbix/ui/conf
Enable PHP and the web server:
root@zabbix# svcadm enable nginx php74
root@zabbix# svcs nginx php74
STATE          STIME    FMRI
online         12:39:30 svc:/network/http:nginx
online         12:39:30 svc:/application/php74:default
Start the Zabbix services:
root@zabbix# svcadm enable zabbix:server zabbix:agent
root@zabbix# svcs zabbix
STATE          STIME    FMRI
online         12:40:00 svc:/network/zabbix:server
online         12:40:08 svc:/network/zabbix:agent
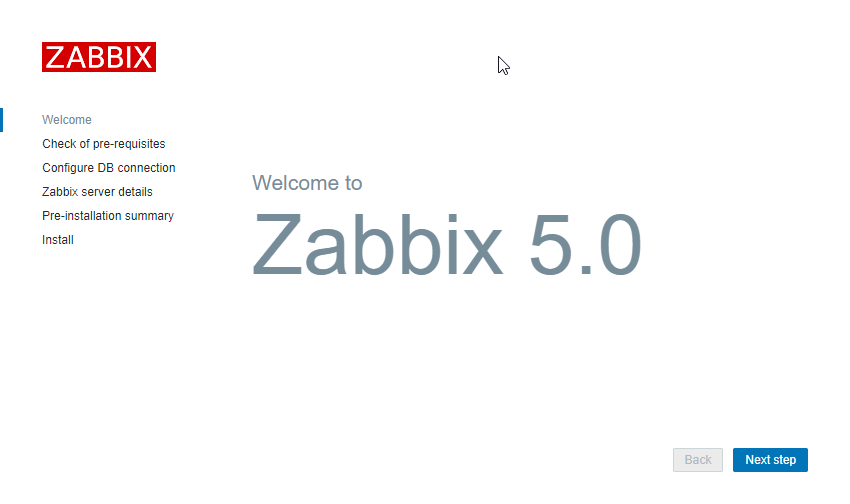
You should now be able to point a web browser at the server and go through the initial Zabbix setup process:

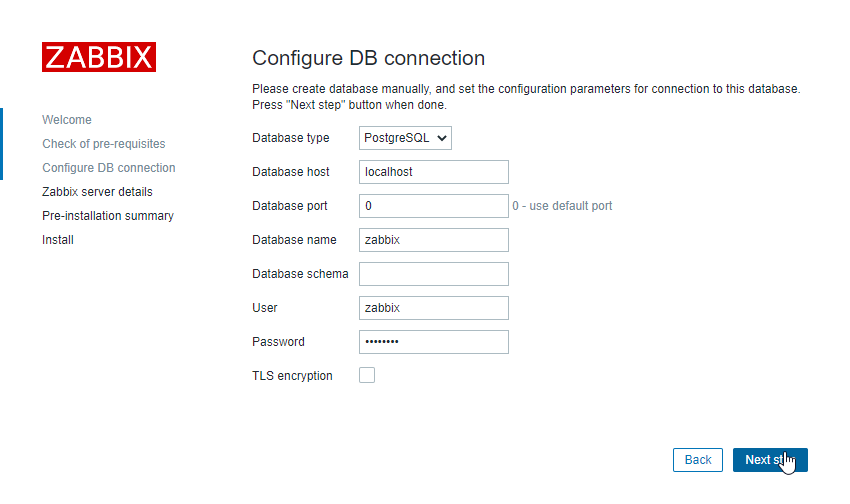
On the database screen, set the type to Postgres via localhost. Enter the password that you set earlier during database creation:

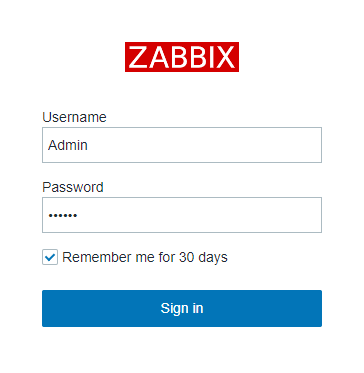
Once you get back to the login screen, enter Admin with a password of zabbix to get started:

Any problems or questions, please get in touch.